

Being “fun size” (some of you may call it short) has one positive for certain- people normally think you are younger than you actually are. Otherwise, you may have no idea the struggles us shorties have. I am 5’3 and struggle everyday with things like seeing the pastor in church, grabbing cookware from the upper cabinets, seeing the stage in a concert, my feet reaching the floor in a tall chair, climbing into tall vehicles and so on.
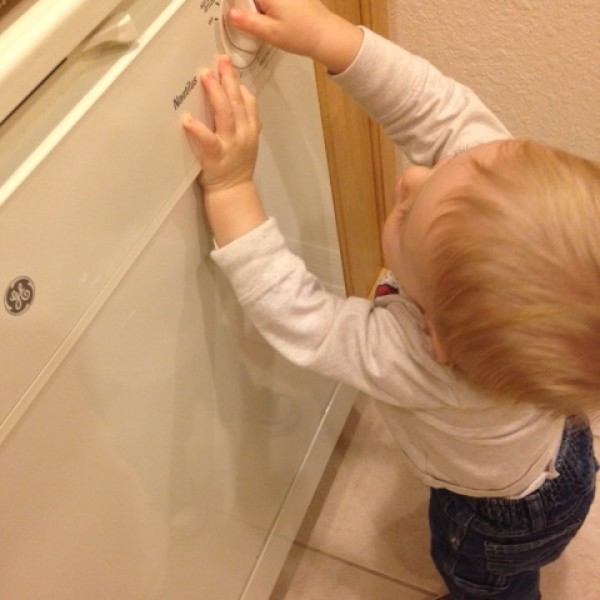
The struggles of a shortie are real. Knowing this, when my son started walking, I tried to always kneel down so he could see me and communicate on his level. When in the kitchen, he would always extend his arms to be raised high to have a look-see at what I was doing.
Have you ever tried to hold a toddler and whisk pancake mix? It is short of possible and can be a mess! After many clean ups and several accidents, we did a little research on children stools. What we found was a “Learning tower” which was amazing but super expensive.
My husband is so handy, and after taking one look at the price and said “I can build an inexpensive children’s learning tower with no problem”. The focus was on a short person(our toddler) begin given better advantage.
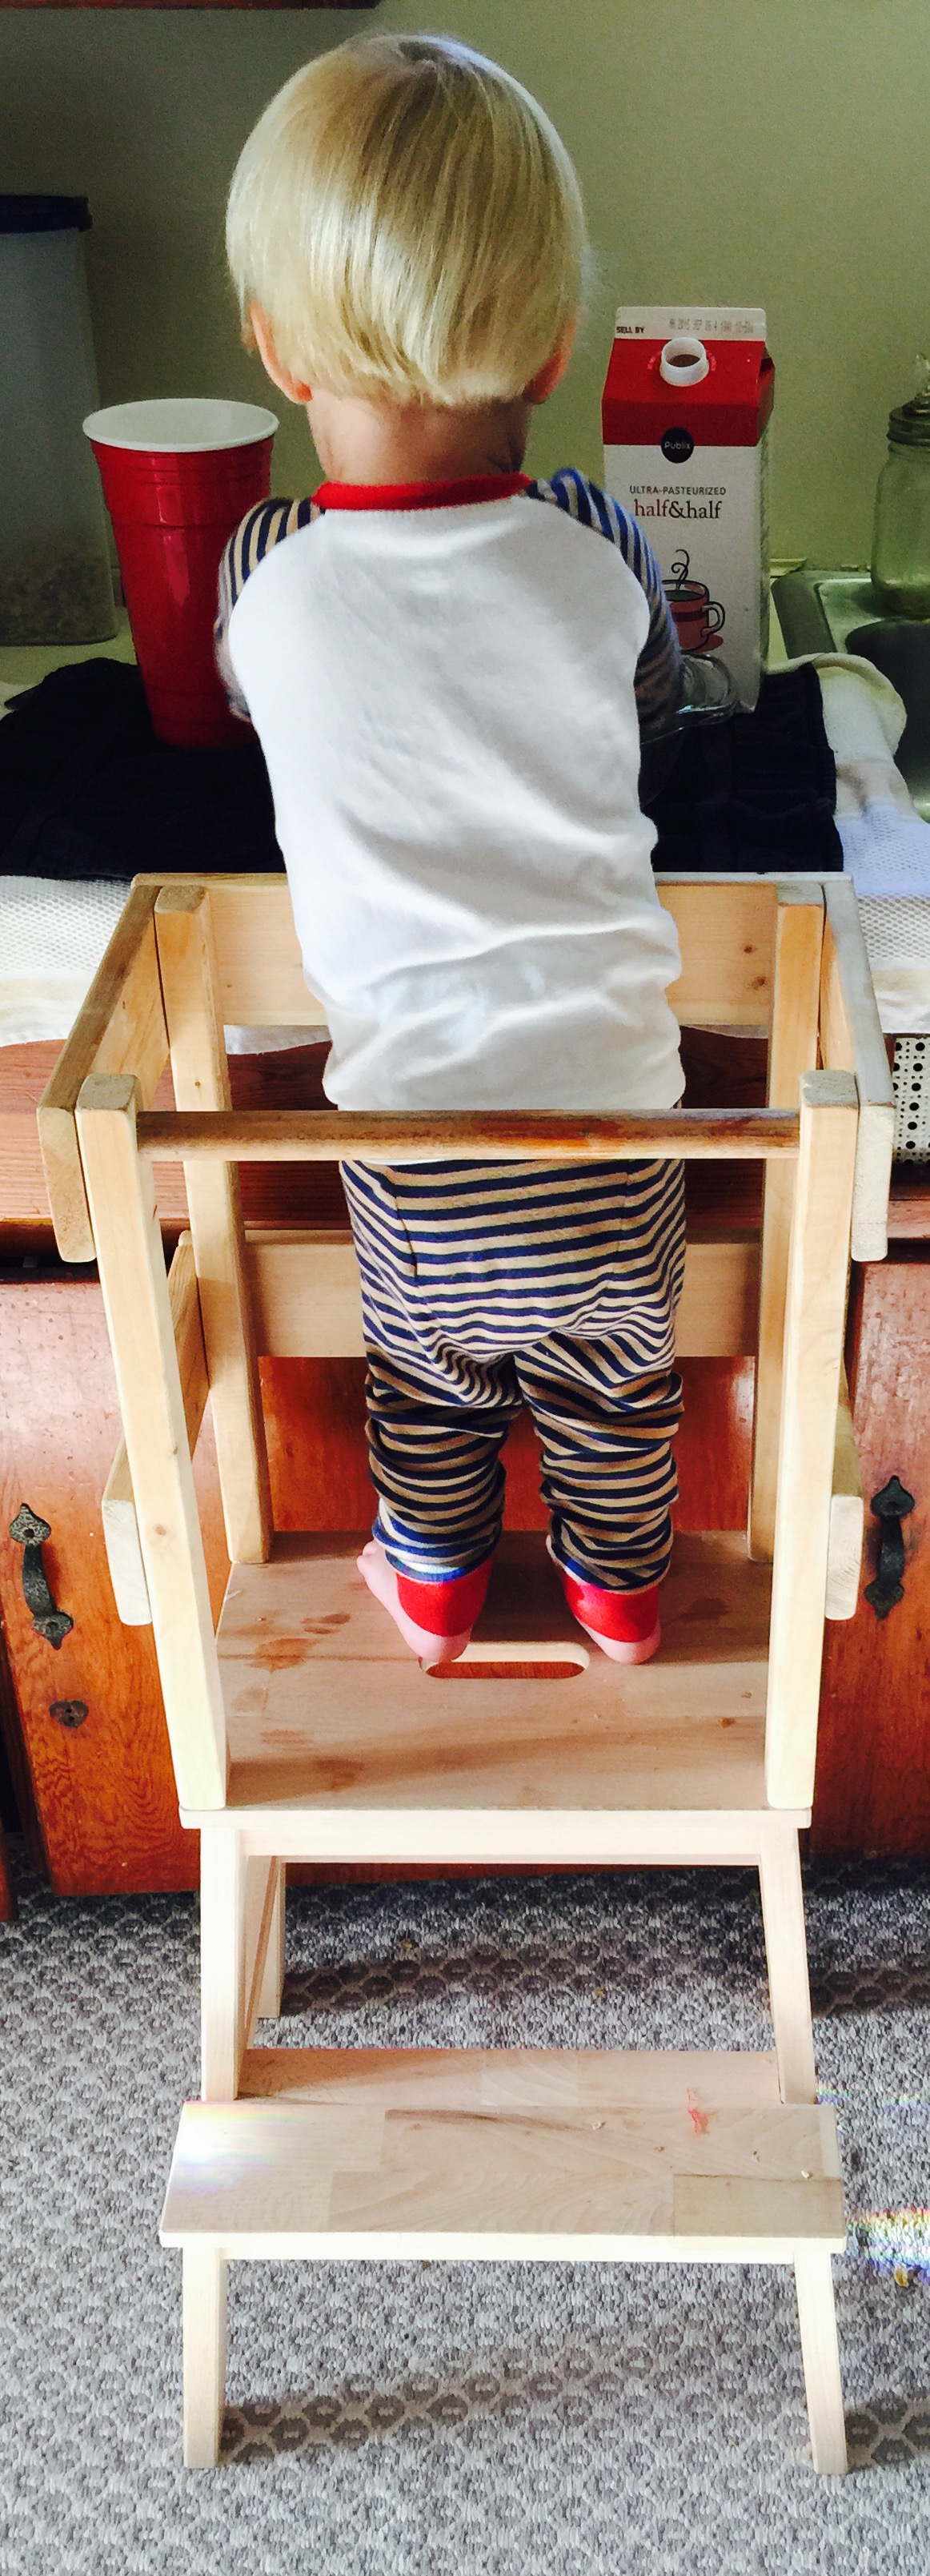
Daniel did a little mind engineering (thats the work my husband uses when he creates something himself) and next thing I know he had ordered everything we needed to build Ramey (our boy) his very own cooking platform.No more worrying about the short syndrome!
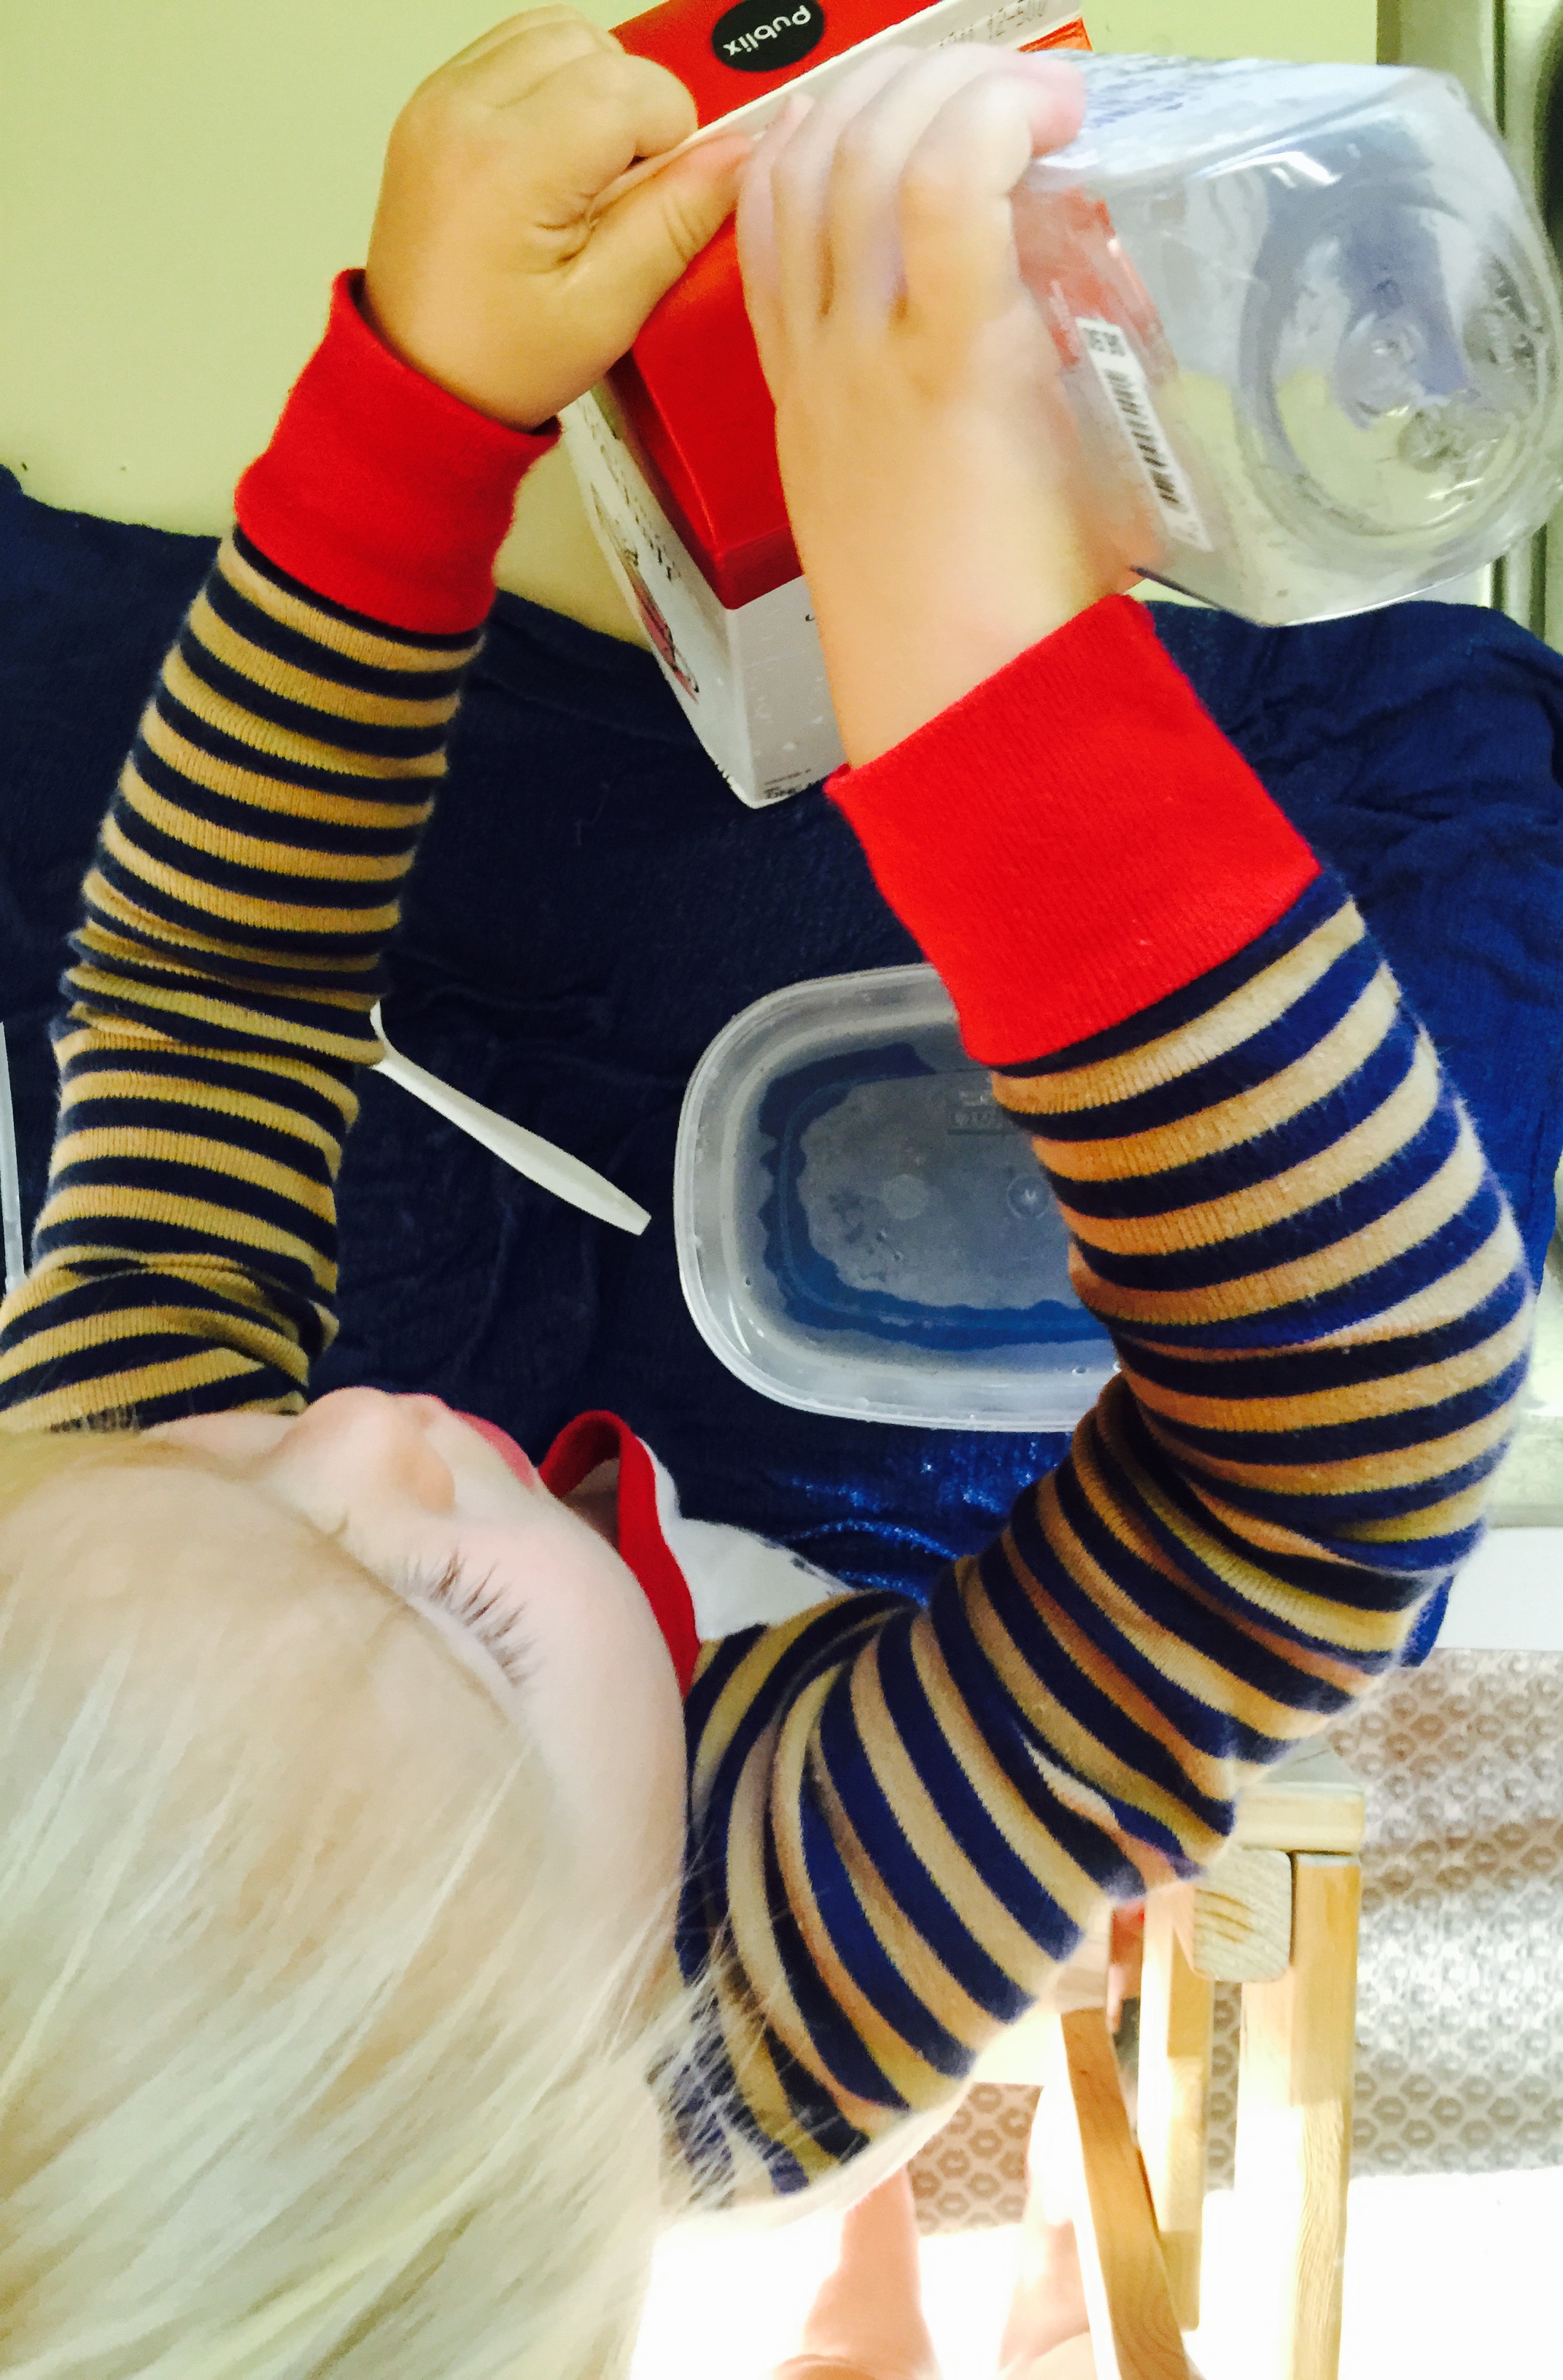
My son is one happy cook these days. A bowl, ice, whisk, plastic cup and he’s happy for hours. Sometimes, he helps me cook, and it’s still a mess but at least my hands are free to catch the big spills.

This is a must-build if you need such in your kitchen. So here are the items you will need to make it all happen:
Here is how you can make a inexpensive children’s learning tower!
Materials
- Bekvam stool in bench, $14.99 + tax
- 1x4x72 inches
- Small box of 2 inch wood screws (unless you have extra laying around like Daniel did)
- 5/8″ dowel (14 inches)
- 2×2 (72″-84″ inches which will depend on your counter height)
Tools
- Skilsaw
- Tape measure
- Drill
- 5/8″ wood bit
- Phillips tip for screws
- Sand paper (I would recommend 180-220 grit)
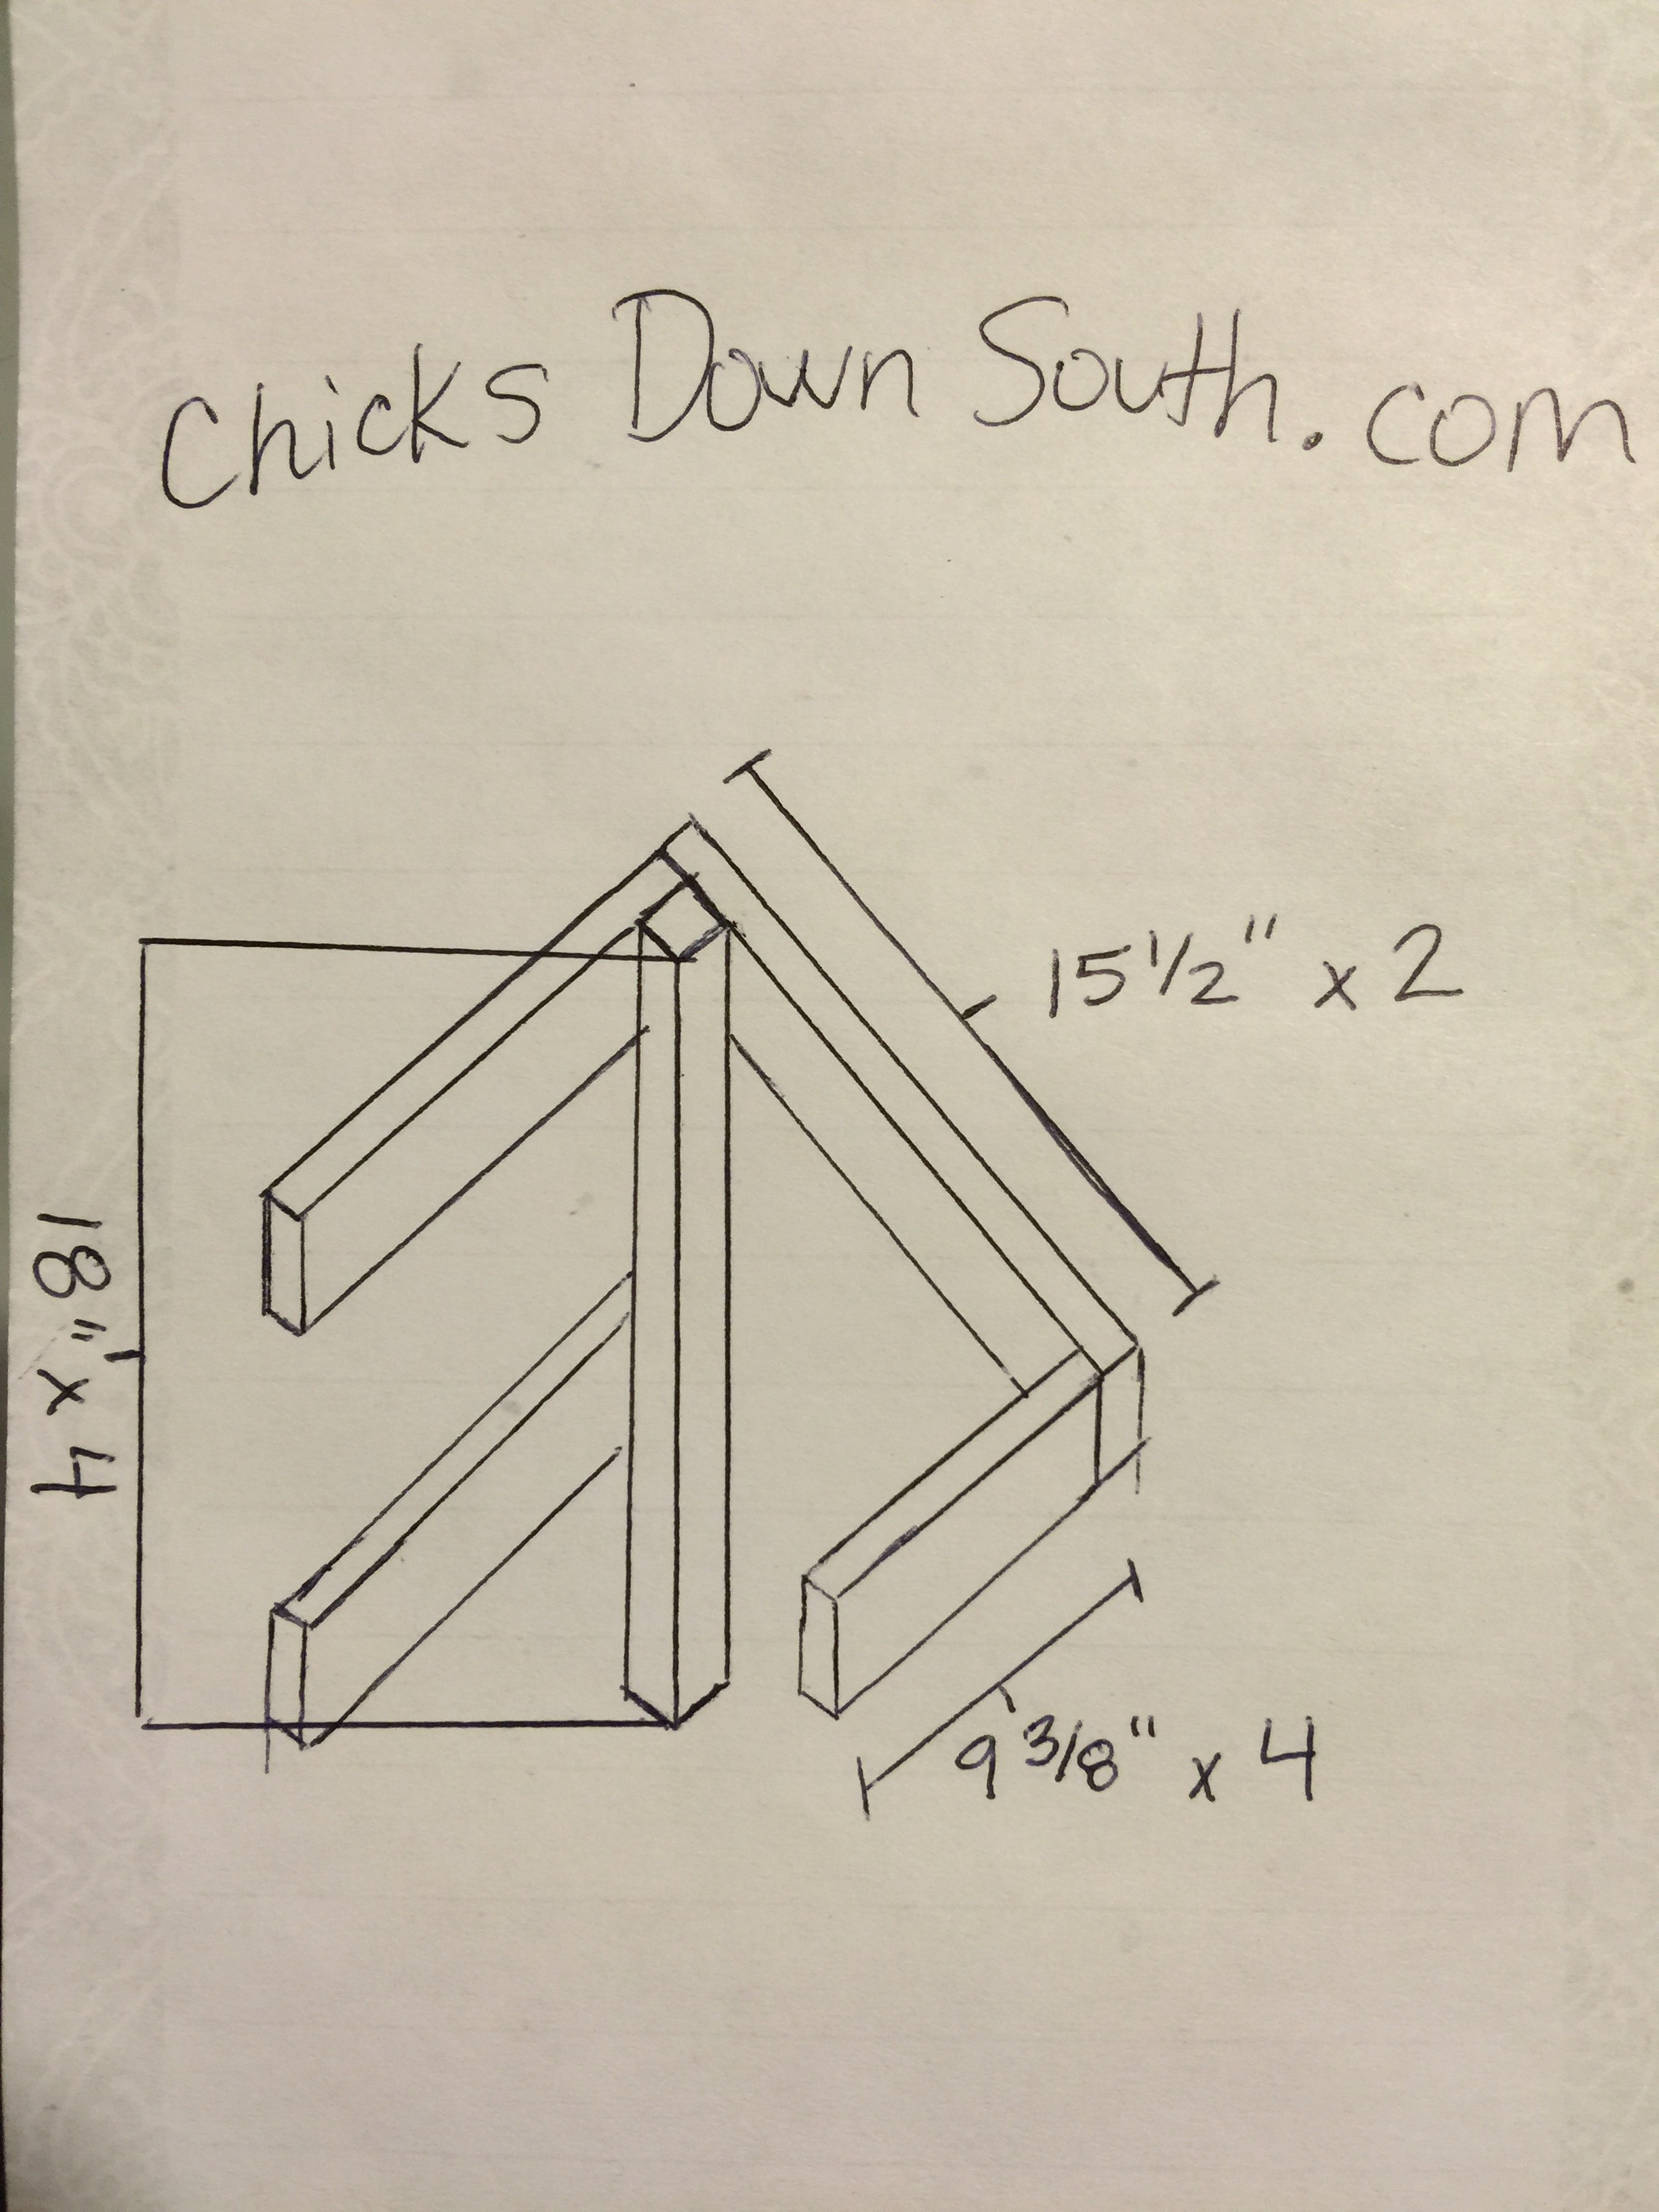
The basic measurements of the tower rails
18″ x 4
15 1/2″ x 2
9 3/8″ x 4
Instructions: (measurements are based off our countertop of 37 3/4″ in height)
- Assemble Ikea stoll legs. Do not attach the top step
- Cut the 1×4 into two 15 1/2″ pieces
- Next cut the 1×4 into four 9 3/8″ pieces
- With the stool fully assembled height of 19 3/4″, he next measure the counter height (ours is 37 3/4″) and then subtracted the totals of the two, 37 3/4 – 19 3/4= 18 inches. Daniel cut four pieces of the 2×2 at 18 inches.
- Before he started assembling the rails, he lightly sanded the corners of all the pieces to prevent sharp edges.
- To attach the safety rail, 5/8″ dowel, you will need to grab 2 of the 2×2 cut to 18 inches. Using a tape measure, measure 1 1/2 from top and drill the 5/8″ holes center and accurately.
- Pre-drill your screw holes to build tower rails to prevent any splitting of wood, assembling top to bottom
- Follow Ikea instruction manual for screwing on the new top step!
Hope your little ones enjoys this design as much as our cheese cake does!
Katie Girl